Step Number One
Professional content writers are exactly that, professional. They take their jobs seriously. When a professional writer has been provided with instructions from a client, they read them carefully to get an understanding of what is required. Professional writers usually note down any points of interest or special instructions that the article requester has given.
Step Number Two
If the article is for your own use then you would normally have chosen a topic or you may have been provided with one as a need of necessity. Ask yourself what are you going to write about and in what way are you going to talk about the topic. Think about the final use of the article and tailor the article to suit its purpose. Think about it: is it promotion, informative article with a action involved from the reader, is it purely for education purposes. Pick a number of approaches from the different article approach types.
You can use anywhere from 1 to all of the different approaches in your article, this depends on the length of an article and the purpose.
Next brainstorm for ideas, writing down ideas and thoughts about the subject. Professional writers do a lot of research on each of the approaches and create some points or questions that they want to cover.
Finally, after jotting down all of the ideas a professional writer valuates whether the ideas are suitable and chooses a method of executing these ideas with the end goal of that article always in mind.
Step Number Three
Know your audience. Professional writers always evaluate the contents purpose. Is this piece of web content being written for a specific audience, for example a particular profession or type of person such as a Internet marketer? Or is this audience knowledgeable about the topic already or are they only new to the subject. Having an understanding on whom the audience is will allow you to set a suitable tone for the article and orientate the content so that the audience finds value in the article.
Step Number Four
Research the topic in detail to provide information that is not common knowledge. When writing an article it is a good idea to have something important, different or informative to say and research is a good way of educating yourself about the topic. There are many resources you can use to find relevant content about a subject. Obviously you can use the internet search engines such as Google, Bing and Yahoo, Wikipedia and the many other information sites on the Internet. When using these sort of resources however it is important to rewrite the information in your own way. Professional writers do not copy information from other sites as this is copyright infringement, they always re-write in their own words the information. The only time when a professional writer will not re-write it in their own words, is in quotes that a particular person has said or when it is a fact in figures, for example a percentage rate.
Step Number Five
Professional writers will always layout a outline of the article and will create a few points they will cover in details. Creating a few points before writing the article is a great way of focusing the efforts of the articles purpose. This is a simple trick to help any writer provide valuable content as well it helps in the prevention of writing filler content that has no value. It is best practice to write unique top quality content for websites as this helps the websites web marketing, web ranking and content marketing efforts.
Step Number Six
Commence Writing. Professional writers are aware there is a method to writing an article.
Always start with an introduction, then the body and conclusion. In the introduction the writer should start by telling the audience what they are going to told about and what they can expect to learn. The body of the article is the details about the topic and mention different points that will connect to the reader and provide valuable information that they were told to expect. The conclusion is where the article is summarized and state any conclusions that the reader should have come to when reading the article. This method of writing is called "being taken down the garden path" by many professional writers as this neatly explains the process.
Step Number Seven
Once the article is completed, professional writers will always proof read the article to find and fix any errors. They also read the article to make sure it reads well and covers the topics well. A common first step is to read the article aloud to ones self, making any mental notes to fully pronounce every word. This helps the writer find grammar errors and inconstancy in the article. Once a reading is completed and any errors have been fixed, this process is repeated again and again until the article is deemed to be satisfactory. Next process is usually to look for spelling errors as a spell checker does not always pick these up. It is quite common for a word to be found in an article that is the wrong word for the sentence but it is spelt correctly or it could be missing a letter such as "s" or "y", professional writers always check for these.
Once a professional writer, be it a press release writer, a blog writer, sales copy writer or any type of writer, has been through the process of writing and checking a few times, they get used to all of these and it all becomes unconscious competence writing. If you follow the steps above, one day you too will be able to call yourself a Professional Writer.
Article Writing Tips
When you are writing an article there are a few items that you can include: who, why, where, when, what and how. If you answer these questions, you are half way to writing a good article.
Check grammar and spelling as you go and when you have finished the article. Spend the time correcting these during the creation process and once the article is complete and don't forget to include LSI keywords.
What is a LSI keyword? LSI keywords are related keywords and can be found by using Google adwords keyword tool. An example of LSI keywords are words you might find in the same paragraph as a specific keyword ( related keywords ) eg if the keyword is "Article Writing" then LSI keywords include the following: SEO article, web content writing, article writers, article writing service etc.
Do not keyword stuff.
Using too many of the same or related keywords can make an article sounds very unnatural, this will affect the quality of the article. Remember high quality content is king and is essential for success in web marketing. Make sure the article reads naturally and is informative, this is most important.
Use bullet points to break up and highlight some valuable information. Bullet points or numbered points can make writing an article a lot simpler in terms of organization. This is because you no longer have to figure out transitions from one point to the next. An Example is "10 Ways to find the best Article Writing Solution".
Another great side benefit is that readers like lists, they are easier for the eye to follow and help in everything from sales to conversions.
Basically, a Google friendly and optimal article comes down to 7 things:
- A writers skill and experience
- A writers SEO knowledge and skill
- The writers good use of grammar
- Good spelling
- Research and knowledge of the topic
- Unique content ( make sure to use a service that copyscape tests all submitted content just like Articleteller.com does ) You never want to pay for a copied article.
- A well written article that grabs the reader's attention.
 The image that we will create is big, but you can choose a smaller size. So, create a new document 7087х5315 pixels with resolution to 300 pixels (File – New). Now open the image of the dark background, select it (Ctrl + A), copy (Ctrl + C), go to the new document and paste (Ctrl + V):
 Dark background are smaller than the document. Propose to increase the area of the wooden floor. Select the Rectangular Marquee Tool (M), select a part of the floor and copy it to a new layer (Ctrl + J). Slightly increase the floor layer, add the Layer Mask
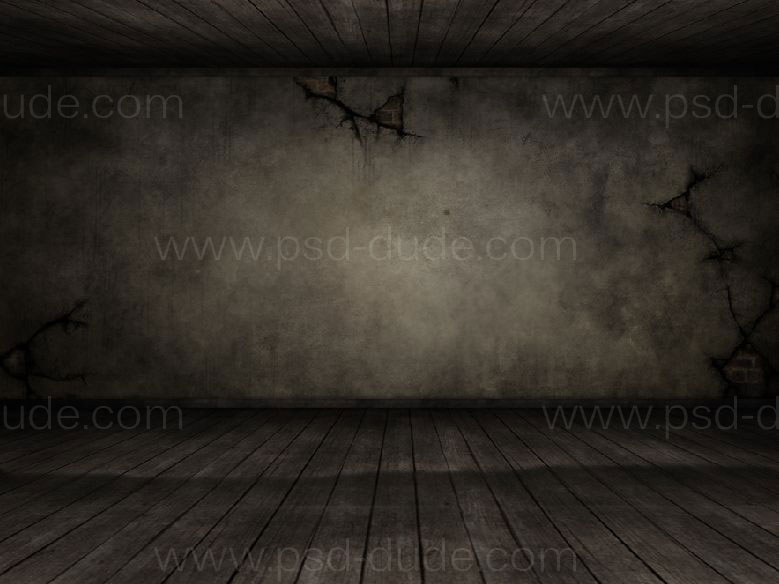 On the wall add torn wallpaper. Open the wallpaper and move it to the main document. Increase layer of the wallpaper (Ctrl + T), copy (Ctrl + J) flip it horizontally (Edit - Transform - Flip Horizontal), then move it to the right. Again, copy the layer of wallpaper and flip it horizontally. Place all the layers of the wallpaper like the screenshot below:
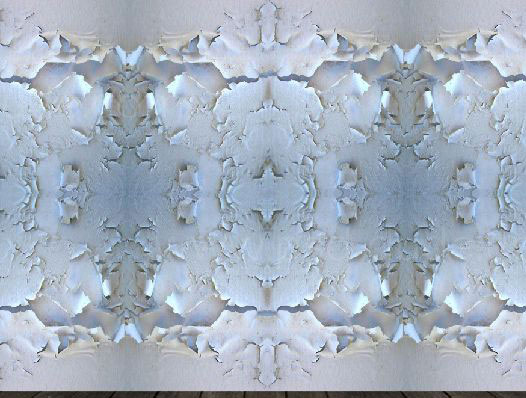 Merge layers of the wallpaper (Ctrl + E) add to the Layer Mask and a soft black brush erase the bottom of the wallpaper. Change the Blending Mode to Multiply and lower the opacity to 63%.
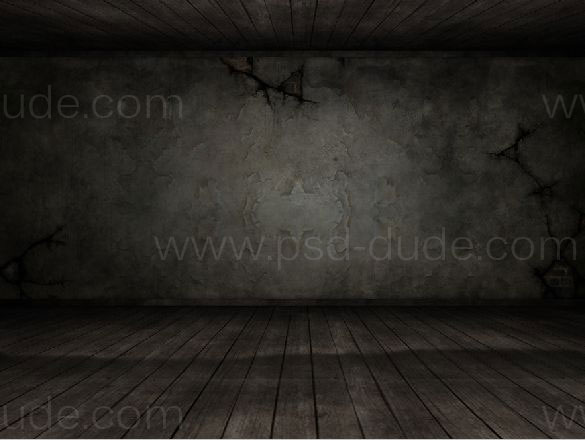 Set the brush Crack select the color # 1e2529 and click brush with number 683 once in the bottom part of the wall:
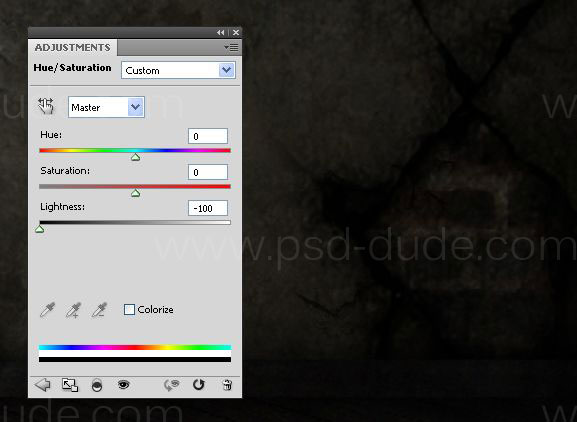
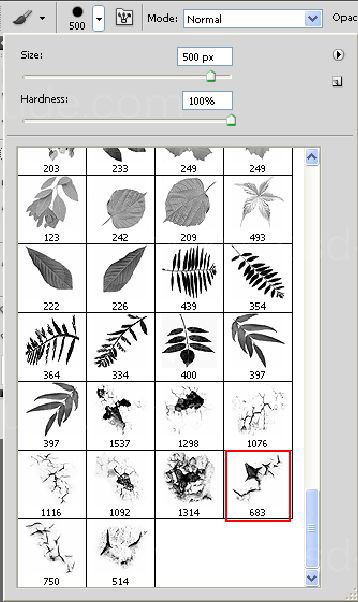 Reduce the brightness to the maximum, adding the adjustment layer Hue/Saturation with a Clipping Mask
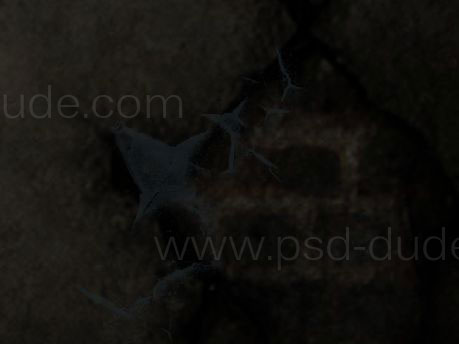
 Layers with cracks on the right side of the wall place in a group (Ctrl + G) and name it "Cracks on the right side of the wall". In the same way add crack on the left side of the wall, with a group called "Cracks in the left side of the wall", only this time use a brush with the number 1092.
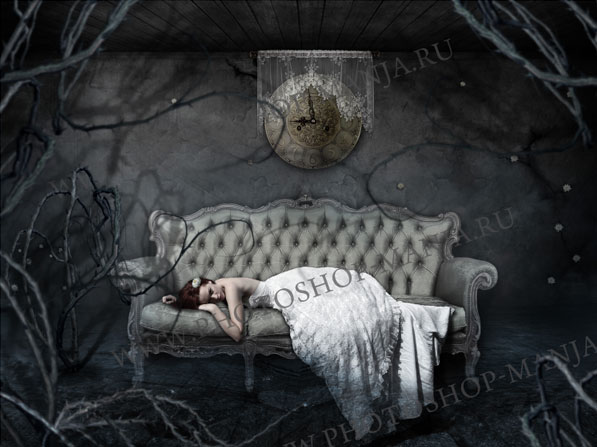
 In the center of the room add a sofa. Open the image Sofa, Quick Mask (Q) select sofa, exit Quick Mask (Q) and inverse the selection (Select - Inverse). Move the sofa in the main document. Layer with a sofa place to the center of the room.
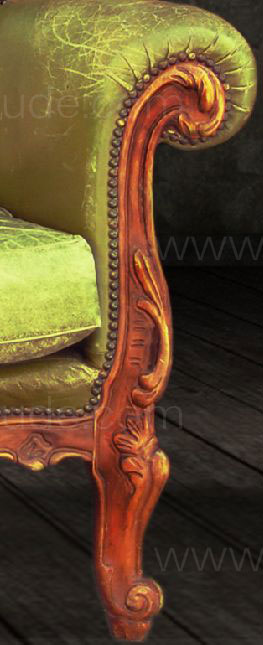
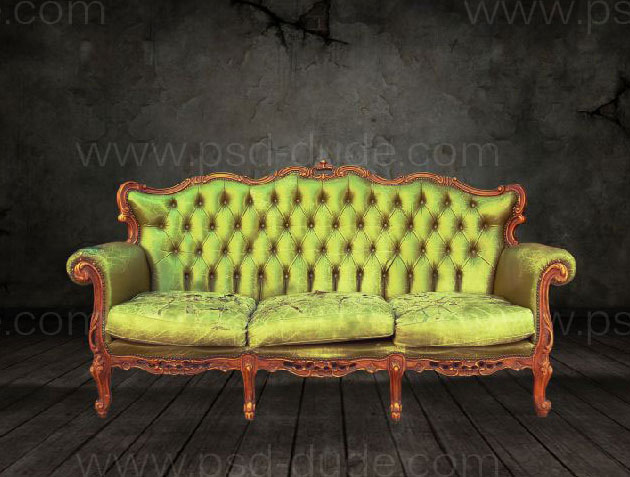 Above the layer with a sofa create a new layer (Shift + Ctrl + N) in the Blend Mode Overlay with gray 50% and apply a Clipping Mask. Name this layer "Darken" and the Burn Tool to darken the wood areas of the sofa. Use Range Midtones and Exposure 11%:
 Over a layer of "Darken" add adjustment layer Hue/Saturation and reduce the saturation of the layer with a sofa. He must fit the color tone in the room.
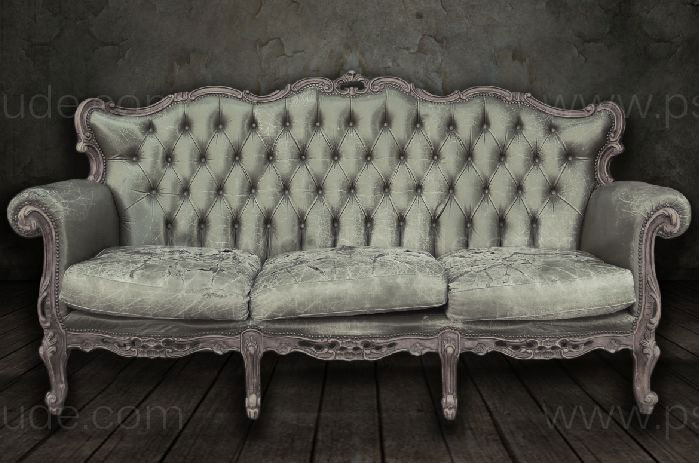
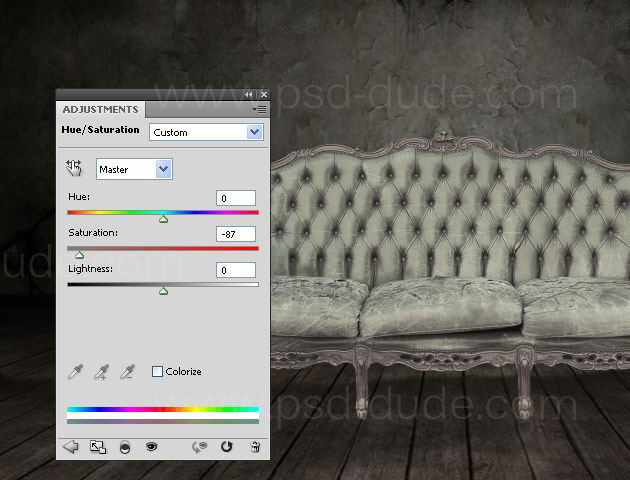 To create a feeling as if the sofa is on the floor, to layer with it, add a layer style Drop Shadow:
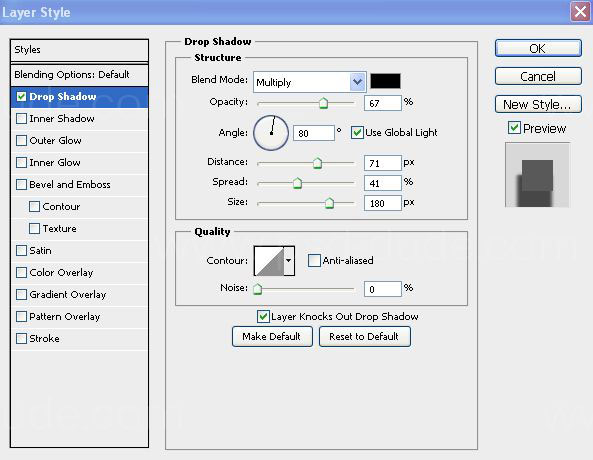
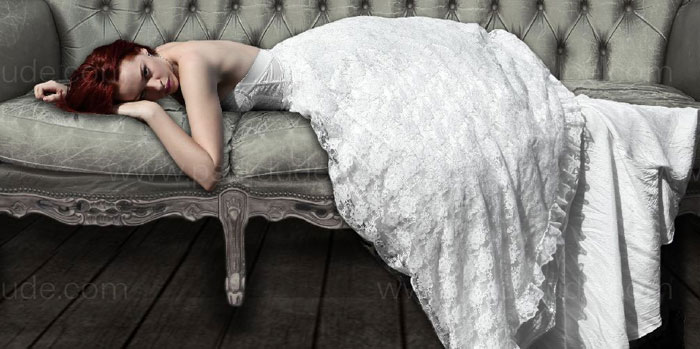
 It is time to put a girl on the sofa. Select it with the Quick Mask (Q) and move into the main image. Put the girl on the sofa.
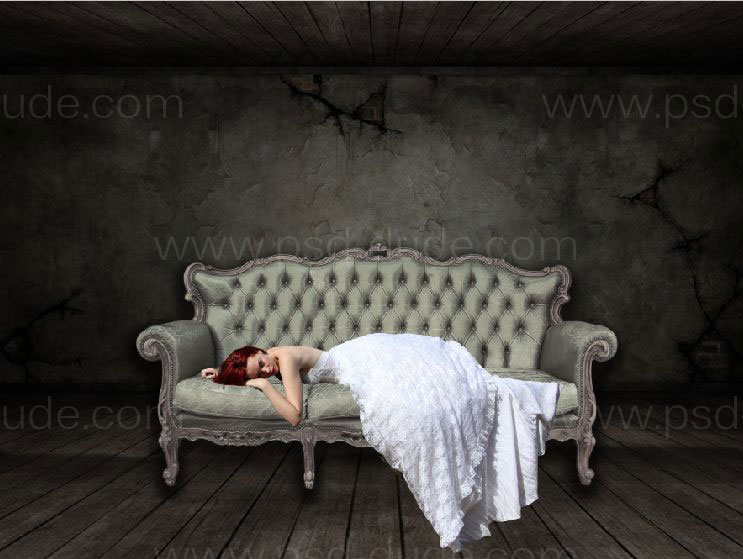 Create a new layer with fill 50% gray, add the Clipping Mask and burn those parts of the skin, to which the shadow, to make them more expressive:
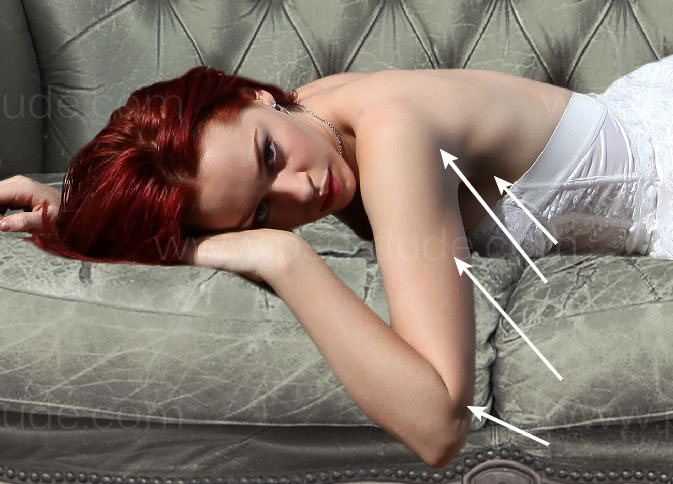 Under the girl's layer add a shadow. Hold Ctrl, click the layer thumbnail to the girl, to make a selection around it, create a new layer below it and fill it with black.
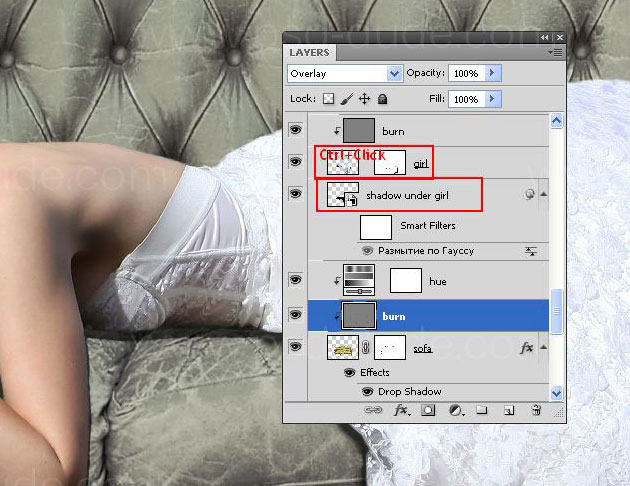 Convert the shadow layer under the girl to a smart object by clicking the right mouse button and selecting Convert to Smart Object. After converting the layer to a smart object, you will see a special icon:
 Now this layer apply smart filter Gaussian blur to make the shadow fluffy and light:
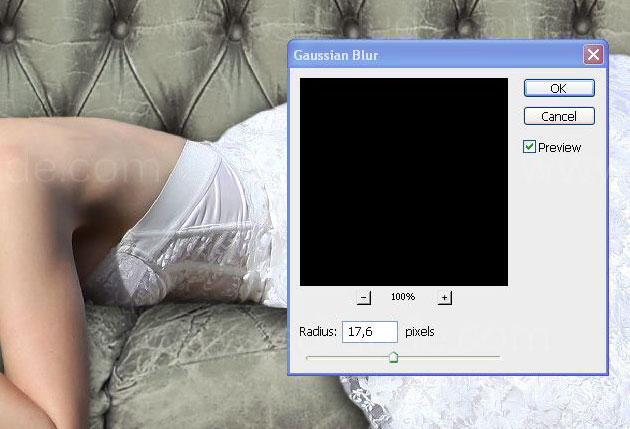 The girl has very bright red hair. I want to slightly reduce their intensity. Select the layer with the girl, selected hair Quick Mask, invert the selection and above the layer with burn add adjustment layerHue/Saturation with a Clipping Mask.
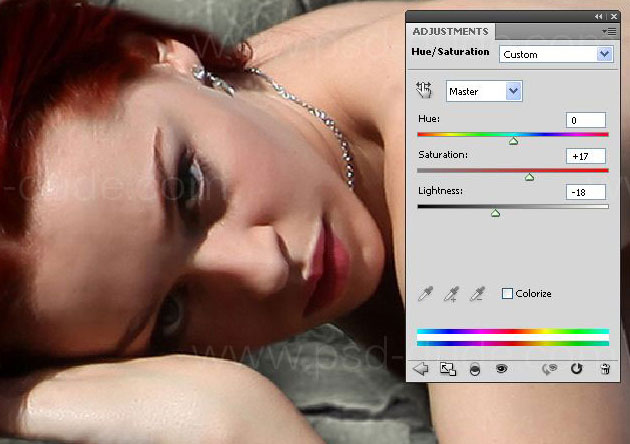 Also, change the color of the lips girl: select lips with Quick Mask (Q), invert the selection and above the layer of Hue/Saturation, which corrected the hair, add another adjustment layer Hue/Saturationwith a Clipping Mask. Set the following values:
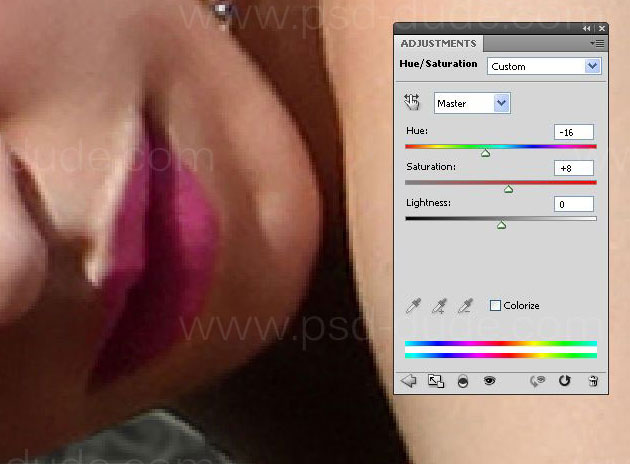 On the lips add light shine: create a new layer above the adjustment layer with which change color lips and paint white brush over the top and bottom lip. Convert this layer to a smart-object and apply a smart-filter Gaussian Blur. Then, lower the opacity of the glow to 6%.
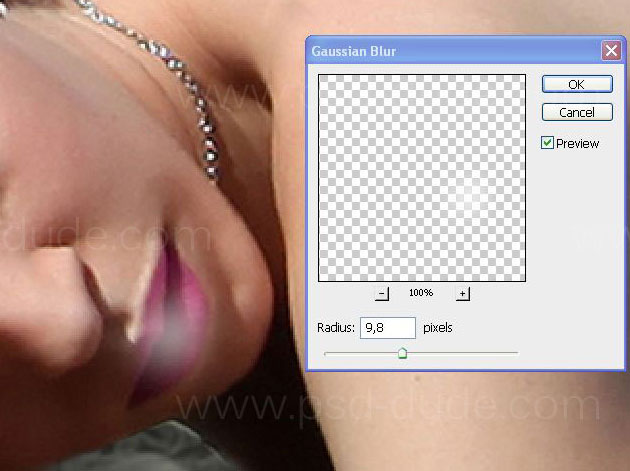 The girl looks too bright. Reduce the saturation of the layer with it. Above the layer with the shine on the lips add adjustment layer Hue/Saturation without Clipping Mask and reduce the saturation:
 Dress the girl looks very white - we give him a light cream color. Select the layer with the girl Quick Mask (Q) paint a dress, invert the selection and copy the dress on a new layer (Ctrl + J). Over a layer of dress create a new layer with fill 50% gray, Blending Mode Overlay and a Clipping Mask and a soft brush Range Midtones with a small Exposure, paint the dress to darken it.
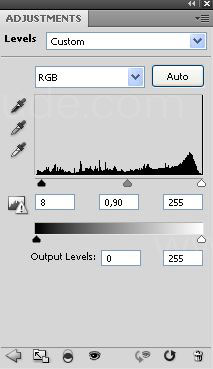
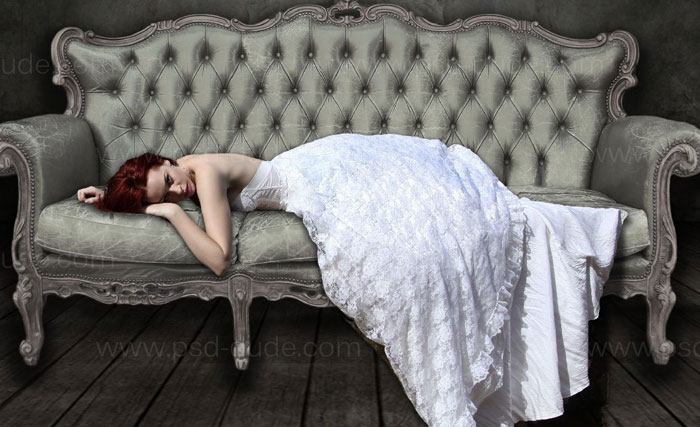 Above the layer with burn dress add two adjustment layers: Hue/Saturation and Levels to give it a creamy tone:
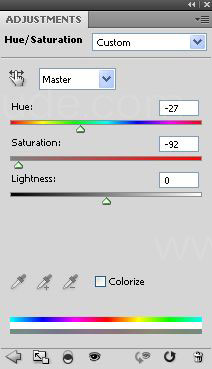
 Open the picture Lily 1, separate from the background and put it on the girl's hair. To add a layer with a lily layer style Drop Shadow:
 Reduce the saturation of lilies, adding a layer above girl adjustment layer Hue/Saturation with aClipping Mask:
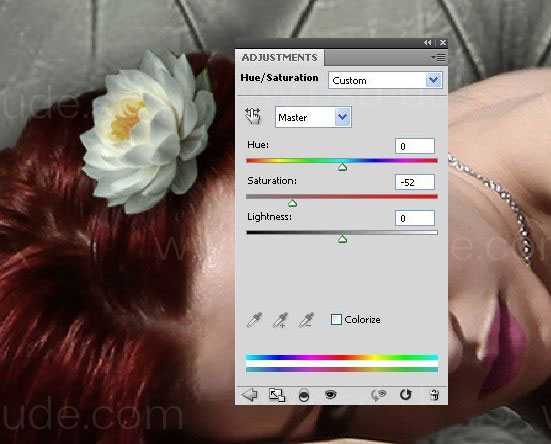 All layers are added in this step put in a group with the name "Woman". The wood floor add water, through which will show through the stones. Open the image with Stones and move them to the main document. Duplicate the layer with stones twice, add to each of them a Layer Mask and with a soft black brush erase the background, leaving only the stone. Place a layer of stones around the sofa and lower the opacity of each of them to 38 to 42%:
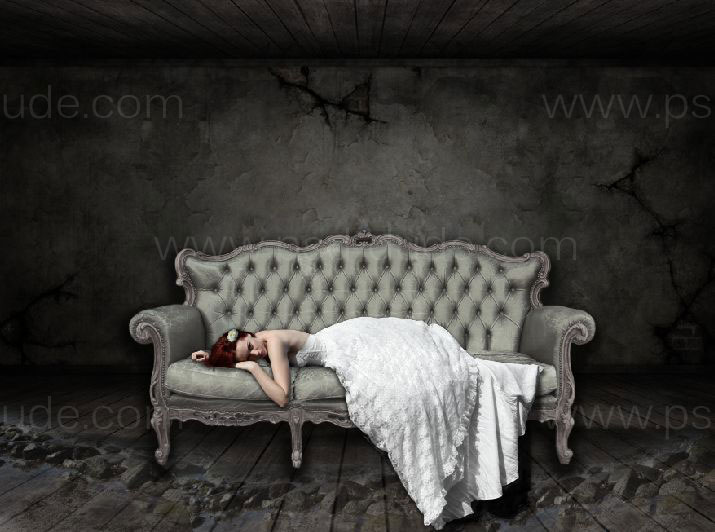 All the layers of stones put in a group with the name "Stones", add adjustment layer Hue/Saturationwithout Clipping Masks to make images a light blue tone.
 Open the image of water, bring it into the document and put it above a group of "Girl." Duplicate this layer (Ctrl + J), flip it horizontally and align these two layers so that the pattern matched stones. Change these layers places. A layer of water, which is located on the right side of the image, move a little under another layer of water and combine these two layers (select them by holding down Shift and press Ctrl + E). To this layer add a Layer Mask and a soft brush with a black color and opacity of about 50%, paint along the seam to smooth it. Then, reduce the opacity of the brush and erase the water, leaving only it’s light color and a bit of fog. Sofa and dress should be in the water:
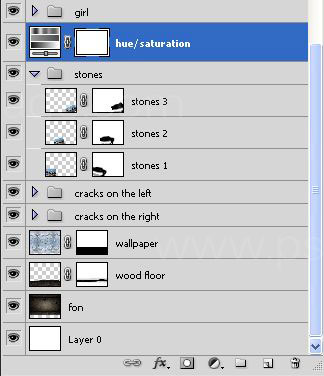
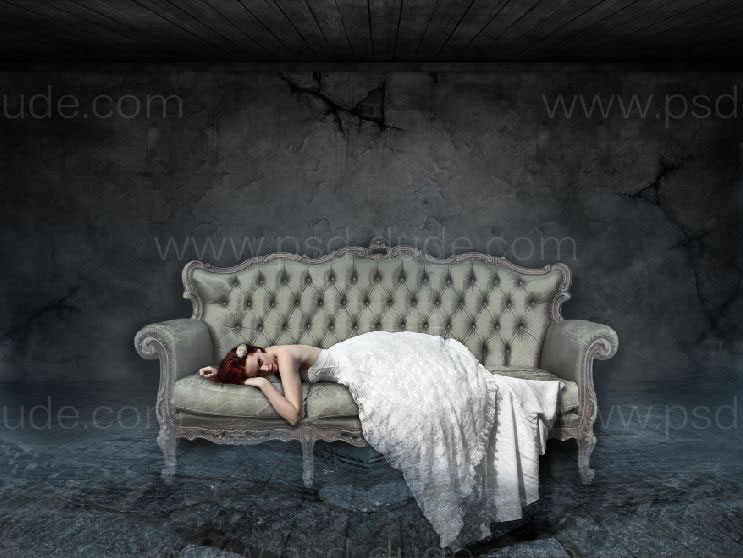 The layer of water place in the group, which is called the "Water". Open the watch drag them to the document and a bit down the (Ctrl + T). Place the watch in the center of the wall above the sofa. Above the layer with the watch add adjustment layer Hue/Saturation with a Clipping Mask.
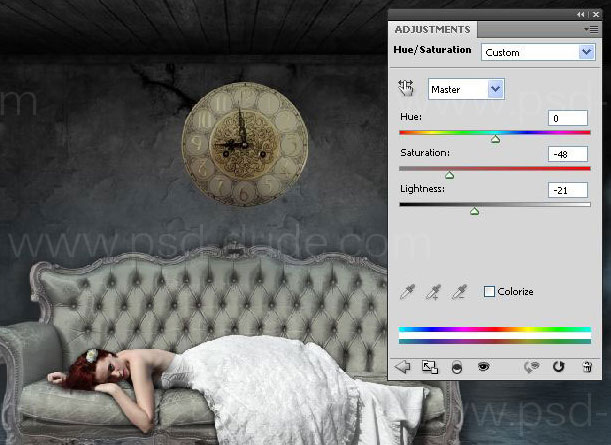
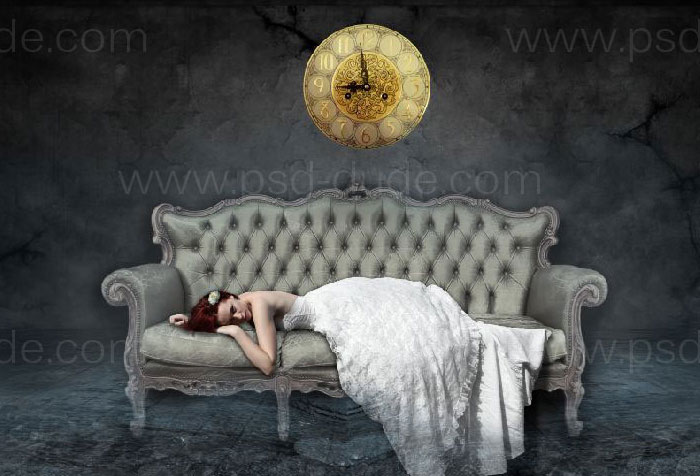
 Under the layer of the watch create a new layer (Shift + Ctrl + N) and name it "Shadow under the watch". Ctrl + click the layer thumbnail to the watch to make a selection around it, go to the new layer and fill it with black. Move the shadow layer down and to the right, convert the layer "Shadow under the watch" to a smart object and apply a smart filter Gaussian Blur:
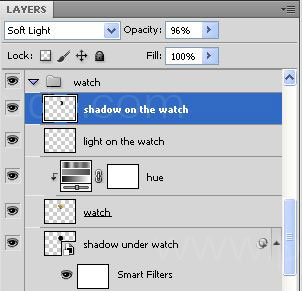
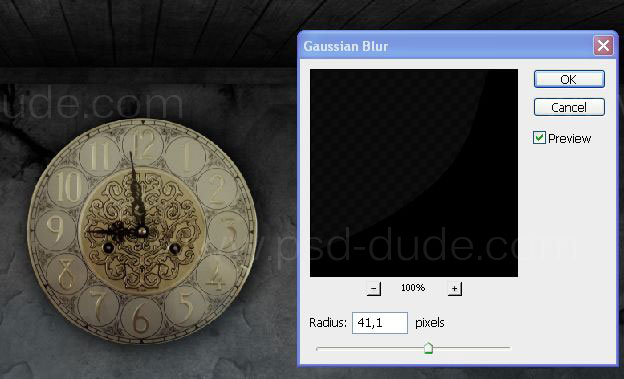 Since the light will fall on the left, you need to add to the left side of the watch a little flare, and on the right - a shadow. Above adjustment layer Hue/Saturation, which we used to watch, create a new layer and name it "Blick on the watch". Select a soft brush with a small opacity and paint the left side of the watch. Change the Blending Mode to Soft Light and reduce the Opacity of this layer to 31%. Over a layer of "Flare on the watch" create a new layer "Shadow of the watch" and a soft brush with black paint over the right side of the watch. Change the Blending Mode to Soft Light and lower the opacity to 96%:
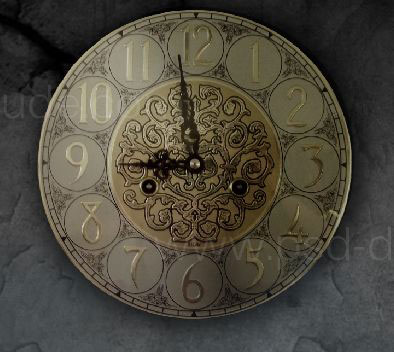
 Layers of the watch, adjustment layer, shadows and highlights put into the group "Watch". Above a group of "Watch" add adjustment layer Hue/Saturation without Clipping Mask to add a dark shade of the watch:
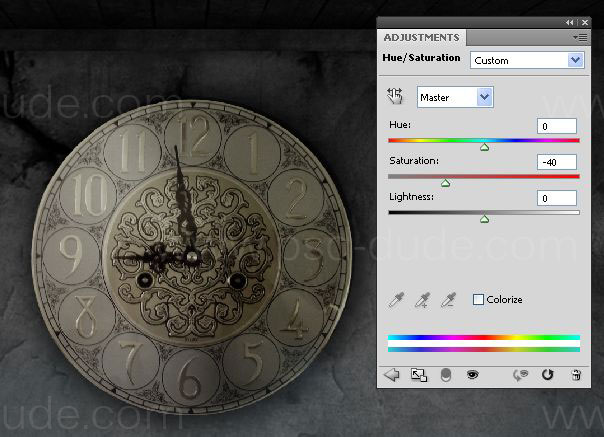 Over the watch add a white Lace Curtains. Open the curtains image, select one of them and move to the document.
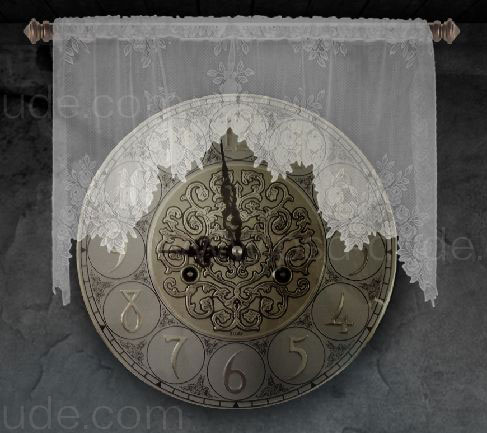 To the layer with curtains add layer style Drop Shadow:
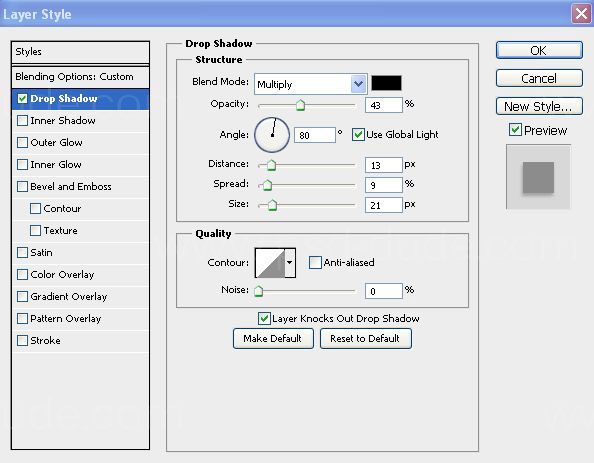 Make a curtains transparent adding a layer over it adjustment layer Levels with Clipping Mask:
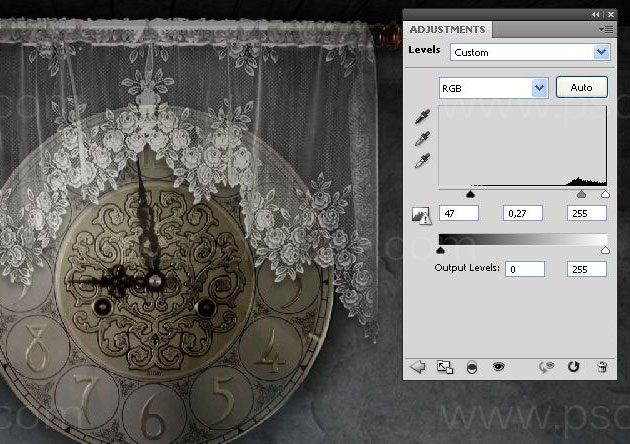 Cornice after application level was bright and distracting from the overall picture. With the Quick Mask(Q) select right and left side of the Cornice, above the Levels adjustment layer add adjustment layerHue/Saturation with Clipping Mask and reduce the saturation:
 Under a layer of curtains create a new layer (Shift + Ctrl + N) and a soft brush with black paint shade under each side the cornice. Change the Blending Mode to Multiply and lower the opacity to 33%.
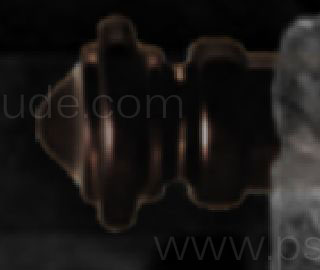 All layers are related to curtain, put a group of "Lace Curtains".
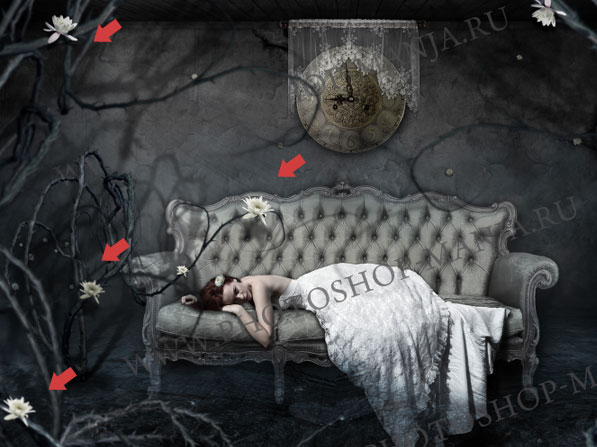
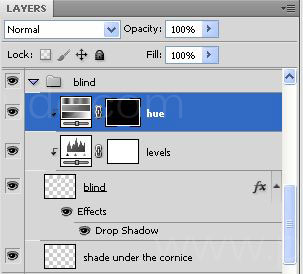 A crack on the right and left sides of the walls add lilies. Open the image Lily 2, separate it from the background and then move it to the document. Duplicate the layer with lily 5 times (Ctrl + J) and place on the crack, as shown in the screenshot:
 For the first layer lily add layer style Drop Shadow, then right-click on the style in the Layers palette and select Copy Layer Style. Select the other layers with lily hold down Shift, right-click one of them and select Paste Layer Style. Reduce the opacity of each layer with a lily to 85%.
 Over each layer with a lily add an adjustment layer Hue/Saturation with a Clipping Mask to reduce the saturation:
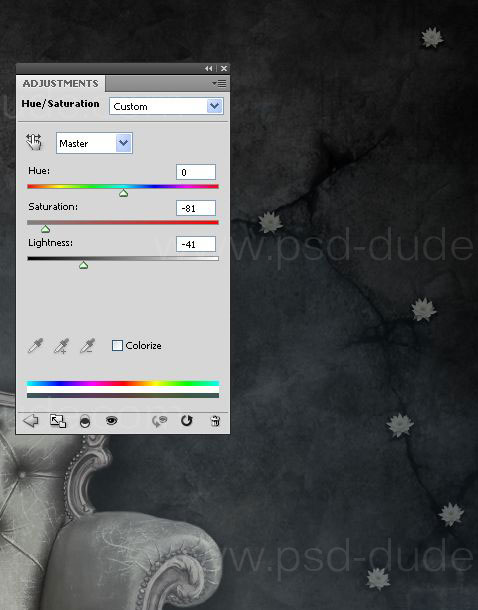 All layers with lilies and adjustment layers placed in a group with the name "Lily on the right". By the same principle add a lily on the left side of the wall and put them in a group with the name "Lily on the left". In the same way add a few lilies in the center of the wall.
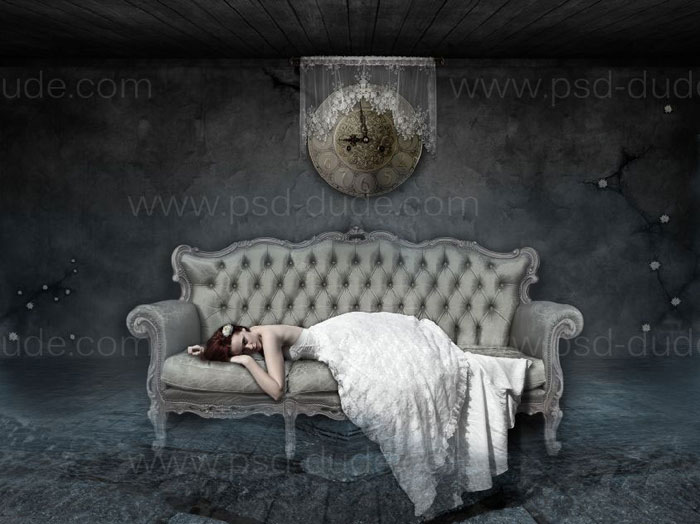 Now add the light rays coming from the left side of the image. Set in Photoshop brush Rays of light, set the foreground color white and any of the brushes click once on the left side of the image. Place the brush as shown in the screenshot:
 Change the Blending Mode to Soft Light and reduce the opacity to 26%. Duplicate the layer with the rays, increase it to the light of it fell on the couch and the girl, do not change the Blending Mode and reduce the opacity to 23%. Again duplicate layer with the rays - without changing the Blending Mode, increase the opacity to 79%, add a Layer Mask and erase the light that falls on the girl. Duplicate the layer again, lower the opacity to 35% and also erase unwanted light from the beam.
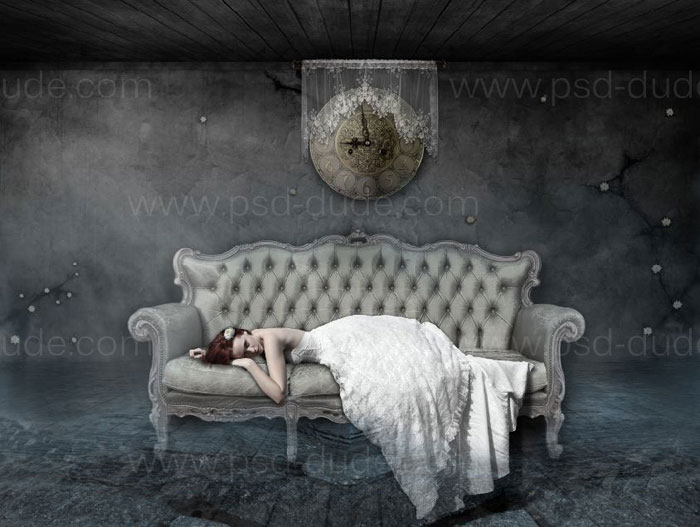 Layers with rays place in the group "The rays of light".
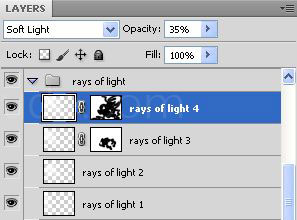 Under a group of "Rays of light" create a new layer and name it "Reflection of light" and soft brush to draw light on water:
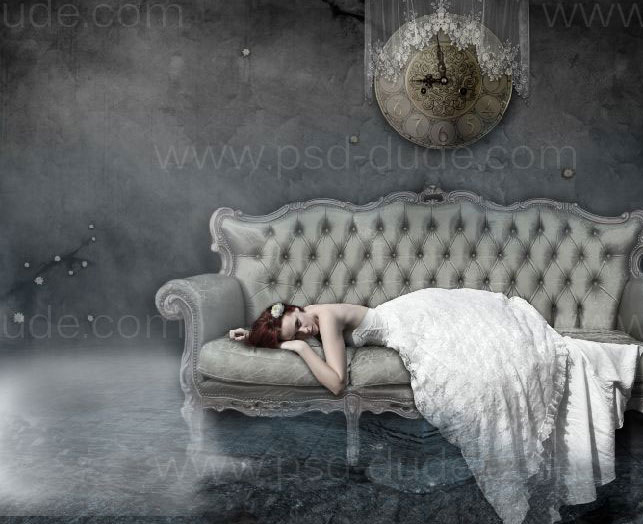 Change the Blending Mode of this layer to Soft Light and reduce the opacity to 41%. On water in the bottom of the image to add a light-blue glare. Set in Photoshop brushes Sparkle, above the layer "Reflection of light rays" create a new layer and draw a highlight on the water, near the sofa. To add this layer to the sparkle layer style Outer Glow:
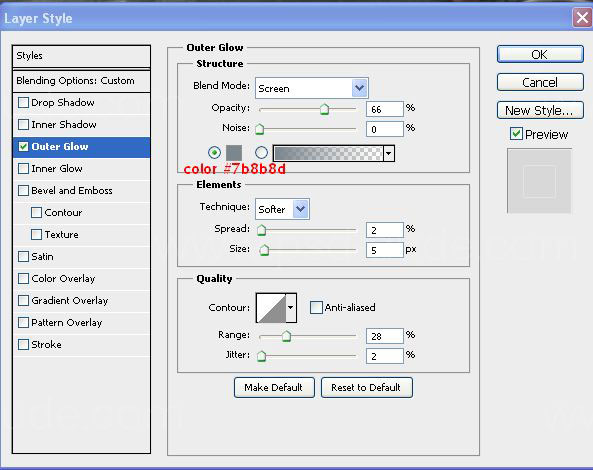 Duplicate layer with sparkle three times (Ctrl + J) and put them and the layer "Reflection of light rays" the group with the title "The reflection and sparkle".
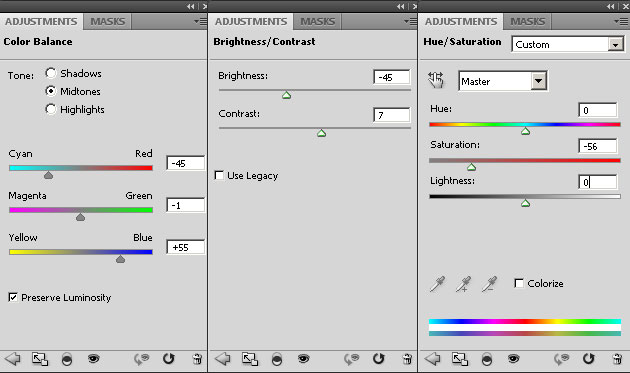
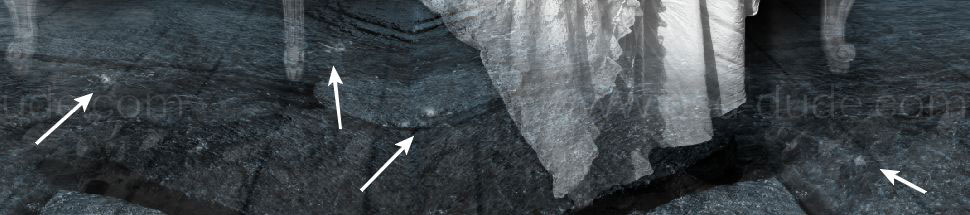 We're almost done it remains to correct the color tone of the image. Above all layers and groups at the top of the Layers palette add a
 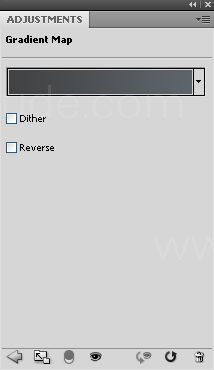 Click on the gradient bar to open the Gradient Editor and create a gradient from dark gray to light gray:
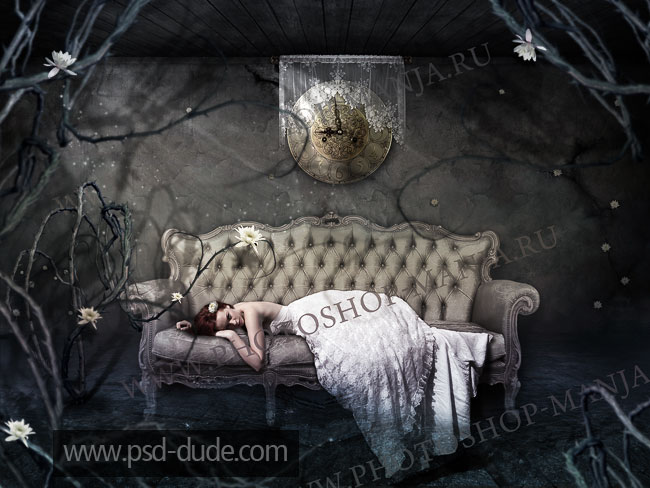
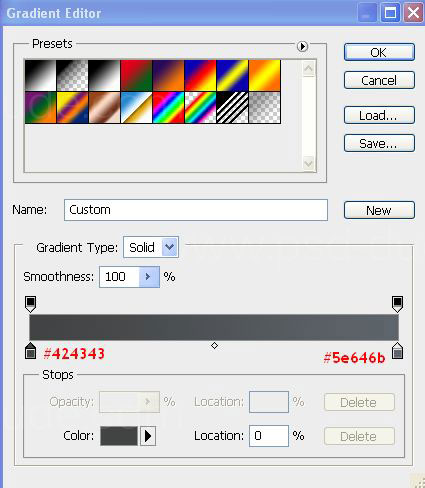 Change the Blending Mode of the adjustment layer Gradient Map to Soft Light and reduce the opacity to 59%. Soft black brush with a small opacity erase on the mask of the adjustment layer the center of the image leaving only the darkening around the edges. Use a small brush opacity. Duplicate theGradient Map adjustment layer three times Blending Mode and opacity do not change.